Ten years before I got into mixing worship sound and installing church audio systems, I worked as a recording engineer. Now I have been working in the house of worship sound biz for 20 years so, if you do the math that would put me back in 1985 when I was freelancing as an engineer. I learned a lot about audio during that time of my life.
Although my skills operating a 2-inch Studer tape machine are not particularly useful right now, I did learned a lot about microphone placement and technique. As a sound tech, besides educating your volunteers about mic selection and placement, it’s important to work with your soloists — some of whom may have never worked with a microphone — and make sure they understand performance mic technique.
Vocalists
One of the first things I learned in the recording studio world that I brought with me into the worship sound world was vocal mic placement. I treat singers different from preachers. So, I want my lead vocalist to sing about four inches from the microphone and my harmony (back-up) vocalists to sing at about six inches from the mic. In the event you don’t have a tape measure, make a fist with your right hand and with the thumb facing your mouth, place that fist between your mouth and the microphone. That is a good working distance for your lead singer.
The same fist is used for the back-up singers except here you will extend your thumb towards your mouth. That adds about two inches to the first distance. That is the method for estimating the distance between your mic and your mouth but keeping that distance constant is the real technique. The reason you want that distance to stay the same stems from proximity effect. What that means is the closer you get to a directional microphone — probably all the mics at your house of worship — the more bass or low frequencies you will hear. Therefore if you sing (or speak) at a consistent distance from your microphone, the mixing engineer will not have to constantly adjust the EQ on your voice.
The Spoken Word
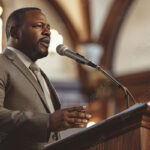
Now we get to the spoken word. Preachers fall into a few different categories. There are those individuals who speak into a stationary mic (on a podium or stand), those that use a handheld microphone (usually wireless) and those that wear a lapel mic. With the stationary microphone preachers, I let them decide how far away from the mic they want to deliver their sermon but I also ask them to keep that distance constant — another part of my tech’ing mission. Once again, a consistent distance means a consistent EQ.
When setting up a preacher with a lapel or lavalier mic, I like to place my microphone as close to the trachea as possible. That is the area where the throat meets the breastbone. In this location, your lav mic will get good volume from the mouth and warm resonance from the throat. A lavalier microphone is the easiest to EQ and control because once it’s in place, it doesn’t move — and the same applies to headworn mics. Lastly, we have those preachers who use handheld mics. This group can be the most challenging. Once again, I let my ministers set their own distance from the microphone. However, with a handheld it seems more difficult to get the user to maintain a consistent distance. Many orators will use the microphones proximity effect to accentuate their sermon. I don’t tell my preachers how to preach, so paying close attention to your speakers’ personal mic technique will help you mix a smooth sermon. In extreme cases, I add a compressor to the audio chain and let the processor do the work, but sometimes a little finger fading does the trick.
Now that we have our vocalist and preachers covered, let’s take a look some mic techniques for the instruments.
Drum Miking
Starting with the kick drum, I want one that has a front head with a sound hole. I set my kick drum-specific mic just inside the entrance of the hole and EQ to taste. If the drum sounds hollow or overly resonant, try stuffing the bottom of the kick drum with a pillow or piece of foam rubber. When miking a snare drum, I like to use a Shure SM57 or equivalent. Rather than pointing the microphone directly at the drum head, I place it horizontally between the snare and the high hat. With a little experimenting on the mic placement technique, you can get a really nice mix between your snare and high-hat and you only use one mic. Now I wouldn’t use this type of microphone setup in a recording studio, but I have had very good results in the live sound world.
For my overhead drum mics, I set them up high enough above the cymbals to capture the sound of the snare, toms, high-hat and of course cymbals. I generally use condenser mics (dynamic mics can also work well) and roll off frequencies below 160 to 200 Hertz. Use your ears and equalizer and you can get a great drum sound with just four microphones. I you want to mic all drums and cymbals, them place your drum mics at the outer edge of the drum heads about an inch above the head. Your high-hat mic is placed at the outer edge of the hat about two inches above it. For cymbals, I place my microphones about six inches above the outer edge of each cymbal. If your church uses the same drum kit every week, it won’t take long until you are very familiar with the sound of each drum and cymbal. It will allow you to experiment with your drum miking techniques once you have a solid audio reference.
Guitar Miking
These days, most acoustic guitars have onboard pickups and a good direct box may be all you need for that sound and the same applies to bass and electronic keys. Lastly, we have electric guitars. If I am miking the front of a guitar cabinet, I want to place my mic at the outer edge of the speaker. This is a simple and effective position but you have to know where the speaker is mounted behind the cabinet grill. With open-back combo amps, I sometimes mic the speakers through the back of the cabinet. Once again, if you have the same guitar player (and amp) every week you have the luxury of experimenting with your miking techniques. As a matter of fact, the more you listen to the subtleties of microphone placement the more you will develop your own personal techniques, and pass these on to your volunteers.


