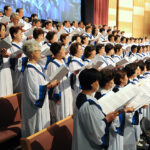
Miking a choir can be one of the most challenging and frustrating experiences for a church sound engineer. On the flip side of the coin, a great sounding and happy choir can be one of the most rewarding experiences in church audio. There’s a complex set of factors involved in how a choir is reinforced, and each situation is different. Use your ears and your own experience to determine the best way to capture your church’s choir.
Know the Choir
The first step to getting a great choir sound is to know your choir. You need to know the sections of the choir, where they sit, who the strongest singers are, and then play to their strengths. One great idea is to diagram out the different sections of the choir, altos, sopranos, tenors and basses for your staff and volunteers. If you have inexperienced volunteers mixing your services, they may not know the difference between the sections, so having a basic diagram can really help when the conductor asks for the tenors to be turned up. Have your staff and volunteers solo up the different choir mics into their headphones so they can hear how each section sounds. This should help them get a better blend between the different mics during services.
Microphone Selection
Mic selection and placement might seem like an easy task for a choir, but in fact it can be complex and it requires some trial error in your own space to find the right approach. When I first started working in my church, they had a set of four shotgun mics hung over the choir. The gain before feedback was excellent, but the sound was spectacularly bad! The shotguns spotlighted just a few of the voices in the choir while almost completely isolating the others. I’m sure they were put there with the best of intentions, trying to squeak a bit more level out of the choir before feedback, but they created more problems than they solved.
Over the years, I experimented with many different microphones and placements. In all cases I used condenser microphones, large diaphragm, small diaphragm, and various polar patterns. Most recently, I have settled on a set of four Earthworks choir microphones with a hypercardioid polar pattern. While the polar pattern choice might seem a bit unorthodox, I found that it gave me the best balance of open and natural sound, gain before feedback and isolation from adjacent sound sources. The slightly tighter polar pattern (relative to cardioid) also preserved a better ratio of direct to reverberant sound for the choir, helping their clarity and diction cut through the room’s natural reverberation.
Monitoring
Choir monitoring goes hand-in-hand with choir miking. The two cannot be separated from one another, so any attempt to change or improve choir miking must be done with monitoring in mind. The best choir monitoring setups always consist of flown monitors above the choir. The choice of monitor is a critical element to the system’s success. You need a monitor that’s going to cover every seat in the choir loft without spilling a bunch of energy into the surrounding area. If you have a speaker whose coverage is too wide, it’s going to excite the reverberant field and muddy up your choir mix. Work hard on placement and aiming to make sure that you get good coverage and minimal spill. When it comes time to actually dial up the monitor mix, be judicious with what gets sent to the choir’s mix. There’s a natural tendency for the choir to keep asking for more, more, more of everything. As we all know, everything can’t be louder than everything else, so there has to be some give and take. Work with the choir to find out what they really need to hear most in order to keep time and maintain their pitch. Also, don’t overlook basic techniques such as good gain structure, high pass filtering and ringing out the choir monitors well without hacking them to death.
Isolation
One of the most common challenges for getting a great choir sound is achieving some degree of isolation between the choir and surrounding instrumentation. I’ve done many rehearsals with a choir on their own or only with piano accompaniment. The next night, we would bring an orchestra in to do a full rehearsal. The first night was always easy. I could get great level out of the choir, they could be heard clearly, and they were happy with their monitor mix. As soon as the orchestra came into play, things quickly fell apart, and I’d have to work really hard to get things back to a place that everyone could be happy with.
When you place microphones on a choir, do so with isolation and rejection in mind. Where are your loudest instruments going to be located? Can you move them to be a bit further from the choir microphones, or at least move them into a microphone’s area of best rejection? Can you use a shield or other sound isolating barrier to reduce the level of bleed? Can you close your piano lid, or face the open lid away from the choir? These are all questions you have to ask yourself in your own space. Every little improvement you can make will help.
One More Thing…
Finally, the single most important part of getting a great choir sound is to have a good rapport with the choir and their director. In the vast majority of churches, the choir members are volunteers just like a lot of our tech team members. That’s always worth keeping in mind when working with your church’s choir.
Vince Lepore is the director of event technical operations at Full Sail University.
Photo Caption: Awareness of nearby instruments can be an important issue regarding mic placement, such as this arrangement with the large pipe organ placed directly behind the vocal ensemble.


