Probably the most overlooked issue in house of worship audio is the placement of the all-important microphone. This issue is mostly confined to instrument microphones and choir mics. With regards to speaking and individual singing mic placement, the issue here is usually the end user. However, we will discuss this later. For now, let’s turn our attention to instrument miking techniques. There are a few different ways to mic almost every instrument. So I am going to tell you my tried and true methods, whether it be drums, guitars, bass, brass, etc.
History Lesson
If you go back in time just a few decades, you will discover that these instruments (especially drums) were miked very differently. In the 1960s and 1970s, it was very common to put a microphone on the kick drum and use just one more mic for overhead pickup. This technique provided a very natural sound because it avoided the phase cancellations caused by multiple microphones. I still use this method today in various churches with excellent results. It worked then, and it can still work now.
Specifically, I will use a large diaphragm mic on the kick drum. If there is no kick drum head, I will place the mic (attached to a short stand) inside the drum a few inches from the head and an inch in from the edge of the head. If the drum has a front head with a hole, I will place the mic inside the hole as far as a short stand will allow me. If the front head has no hole, I place the mic about an inch from that front head and about an inch from the edge. If the church is larger, I can add another mic to the snare drum. On a snare, I use a dynamic mic with a cardioid pattern. Placing the mic about half-inch off the drum head and about half-inch from the edge of the head can give good results. I use a similar type of mic and placement techniques for all high toms and floor toms.
And lastly, if I am fully miking a drum kit, I will add another overhead mic and a high-hat mic. I will mic the hat about half inch from the edge of the cymbal and just high enough above the hat to avoid physical contact with the microphone. Speaking of contact, at no time do you want any of your mics to touch the instrument they are miking.
Before I leave drums, I want to mention that many churches have Plexiglas barriers or complete enclosures for their drums. Plexi will definitely isolate the drums from the congregation but it can also cause a variety of acoustic challenges. Sounds reflecting within the enclosure can create some strange “phasing” and cancellation effects, so use your ears and experiment with mic placements and angles. Sometimes a slight change in positioning and/or angle can make a significant change in the sound, so a little trial and error during your rehearsals or sound check can pay off.
Guitar and Bass
Okay, let’s look at guitar (electric and acoustic) and bass miking. As you know, guitar amplifiers can be very loud. So can bass amps. For this reason, many churches won’t mic their guitar amps or bass amps. Or they may use a Plexiglas shield for the electric guitars and electric bass. When I put a mic on a guitar amp, I place a dynamic mic about an inch from the grill cloth and about two inches in from the edge of the speaker (you may need to estimate where the speaker is). For an electric bass, I use a direct box or a direct out from the bass amp. Occasionally, I’ve been able to locate and mic the guitar amp “off stage” to control volume. I have even put the guitar amp in a closet for the same purpose, with good results.
For acoustic guitars with an internal pickup, I use a direct box. However if I’m miking an acoustic guitar, I’ll use a condenser mic and point it at the guitar sound hole at about a 45 degree angle in front of the player’s strumming hand and about two to three inches away from the guitar. The closer you place the mic to the sound hole, the “bassier” the sound will become. If you don’t have condensers at your church, a dynamic mic can work well.
Brass Instruments
Horn sections are not as common in most houses of worship, but I do work with a church here in Los Angeles that uses brass regularly. At that church, I use a dynamic mic on each brass instrument. The individual players will move in closer to the mic for solos and back off when playing with the section.
The Choir
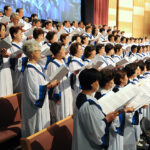
Probably the most challenging task for a church audio tech is miking a choir. There’s a detailed piece in this issue on miking vocal groups (see page 28), but here are a few quick points. The goal is a good balance between the voices, high gain before feedback and a natural sound. Anyway, I typically use condenser mics on my choirs, and just a few. For a 15 to 20 person choir, approximately 10 feet wide and three rows deep, I often use only one microphone.
Even with a 30 to 45 person choir, I’ll use no more than three mics. I find with fewer mics, feedback control becomes easier. I will place my mics two feet in front of the first row of singers.
As for microphone height, I set them two or three feet higher than the tallest person in the back row. This set-up prevents the front row from overwhelming the back row. If I am using more than one microphone, I will place them about six feet apart. If your sanctuary already has choir mics hanging from the ceiling, just adjust the height above the tallest singer in the back row.
Well, that’s about it, my friends. I hope you can put some of the techniques to good use in your house of worship.


