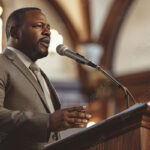
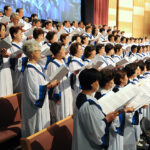
Let me begin by saying that 99 percent of the churches that I have I worked in were built before I was born. So what does this little bit of information have to do with this month’s Sound Sanctuary? Well, the fact is that most houses of worship were originally built without much concern for the acoustic environment inside the finished building. And until recently, many of these facilities built in this country (and the world for that matter) were constructed with little or no consideration as to how the spoken word and music will sound during a typical service.
I have worked in grand cathedrals, stunning churches and cavernous temples that are finished using beautiful woods, stone, marble and glass but lack acoustic panels, banners or drapes. The end result is usually a gorgeous church that doesn’t sound very good. That said, any house of worship can have poor acoustics, even a newly built one. So, how can you make your bad acoustics better?
Back to Basics
Before we dissect things into steps, we need to think a bit about sound waves, measured as cycles per second known as Hertz (Hz), which make up the spectrum of sound frequencies that we hear. Generally speaking, sound systems in houses of worship produce sound frequencies from about 80 Hz to 15 kHz (thousand hertz). Perfect human hearing (not mine) can hear a wider range of frequencies (20 Hz to 20 kHz), but it has been my experience that a typical house of worship does not want their subwoofers to be pumping at 40 Hz and the high end horns sizzling up to 20 kHz. So, that in mind, here we go.
A Three-Step Plan
Step 1: You can’t begin without knowing where you are. You really need to know how your worship space sounds. Get into your sanctuary when it is empty. A good time might be before a service, or perhaps you can go in on an off day or evening. First look at your church. Is it finished in hard surfaces (wood, stone, brick, glass, etc.)? Clap your hands once and listen. Is there an audio reverb present in your room? If so, how long is that reverb (1 second, 2 seconds, 3 seconds or more?).
Next, just listen during a service. If it’s allowable, walk around the room while the preacher is speaking, the band is playing and the choir is singing. Listen from as many different areas in your worship house as you can. Walk up and down the aisles; check out the balcony — if you have one. Listen from one side of your room to the other. Find the areas where the music sounds best (the sweet spots). Listen carefully in these sweet spots and try to identify why it sounds good. Is the music exceptionally clear? Can you understand the singing and spoken word more easily or are the instruments more defined? Besides finding the areas that sound good in you worship house, you are training your ears to be more discerning.
Now find other areas where it does not sound so good and do the same (with your ears). Try to identify why those areas sound bad or not as good. Can you hear the reflection of sound, excessive reverberation or any other distortions of frequencies?
Step 2: Adjust the equalization of the music. Put some programmed music through the main sound system (CD, iPod, phone or whatever). If you have a graphic equalizer that controls the main speakers, push each band (one at a time) up and down and listen to the changes it makes to your music. As you are adjusting the individual frequencies of that equalizer listen carefully to what instruments (including the voice) are affected by the different frequency bands. Your goal is to readily identify these frequencies and know how they sound in your church. And, of course, to make the music sound as good as possible to your ears.
If you do not have a graphic EQ, adjust the equalization knobs on the individual channels of your mixer. Make that canned music sound as good as possible. If you have another sound tech available, this is the perfect time to get a second opinion. Sometimes two sets of ears can be better than one. Once you have got your worship space equalized to your satisfaction, move on to the next step.
Step 3: Now you will have to spend some dollars on audio treatment solutions for you church. I really like to cover hard walls with sound panels. My choice is Auralex (although they are not the only acoustic panel company) for my treatment. They come in a variety of sizes, thicknesses colors and shapes. This product does a very good job of controlling frequencies, but it is probably the most expensive way to treat your space.
If your house has a lot of windows, I recommend heavy drapes to cover them. This is really the best way to eliminate high frequency reflection off the glass. Of course, drapes can be purchased or custom-made in many different colors and materials. Also, drapes can be opened and closed. This gives you control over how “live” you room is. Obviously, closing the drapes will reduce frequency reflection, while opening them will increase it. Drapes can even be used to cover hard walls such as the wall opposite the platform. In the same manner, they can be opened and closed to affect the sound reflection. Banners (which are like drapes) can be hung on hard walls. The only difference is that the banners are not adjustable. However, they are the least expensive fix for audio control.
Ready, Aim…
Lastly, you can adjust how your main speakers are aimed at the congregation. Speakers are directional, so where they are aimed can be very important, if not crucial. If you can, experiment with different angles and direction of your speakers. You can simply tape a laser lever to the top of your speaker box and get a clear view of where you are pointing the sound. A small change can make a big difference in how those speakers will sound in your room. Good luck with your efforts and I’ll talk with you next month.


