One of the big pluses of using a digital mixer is the ability to manage a lot of channels using a small worksurface. We’ve all been in situations where your show consists of more channels than physical faders, and the higher-numbered channels are accessed through different fader “layers” or “banks” (e.g., 1 through 16; 17 through 32, etc.). Depending upon the input list, this can either be a minor inconvenience or a major pain in the arse, like when the backing vocals are on one layer and the lead vocal lands on another. You end up jumping between banks all night in an effort to control all of your input channels. That’s why most digital consoles provide the ability to program custom fader banks. Custom fader banks (along with using DCAs) can simplify your workflow. The trick is creating a custom fader bank that allows quick access to the channels you need most.
One way of organizing channels into custom banks is by instrument. There’s something to be said for having all of the drum channels (or drum plus bass channels) on one bank. Continuing with that philosophy, some engineers might program a bank dedicated to keyboards and/or guitars, and another for vocals — which definitely speeds up the process of balancing background vocals. If the rhythm section is small enough, you may be able to fit all of the instrument channels in a “band” bank, and then have a second custom bank for the vocals.
The DCA Solution
My preference is to get all channels I need on a constant basis into one fader bank and minimize bank switching. Let’s suppose that you have 32 faders on the surface and 48 channels coming from the stage. You can consolidate these channels to a single bank, starting with the drum channels. They may not be “set-and-forget,” but once the drum channels are dialed in (gain, comp and gate thresholds, EQ, reverb sends) you probably don’t need constant access to the individual drum channels. Here’s where DCAs (Digitally Controlled Amplifiers) will help you manage the mix. Assign the drum channels to a DCA and make that DCA the first channel in your custom layer (be sure to name it “Drums” so you know which VCA is which!). You now have control over the drum kit via one fader. If there comes a point in the show where you need to (for example) turn gates off, you can return to the input layer that shows the individual drum channels and access the gates.
I typically create DCA groups for bass, keyboards, electric guitars, acoustic guitars, lead vocals (if there are multiple LV channels), backing vocals and effects returns. Using the effect return channels as an example: I know that I’m going to park the faders at 0 (unity), probably set the high-pass filters around 200 Hz, and pan the left and right channels hard for each effect. Once these parameters are established, I really don’t need to change parameters on the individual channels — but I might need to raise and lower the overall level of the effects, and I definitely need the ability to turn them off in between songs in case one of the band members speaks to the audience. (One of my pet peeves is when engineers don’t turn off the effects as the lead singer is speaking to the audience).
When using a console that has dedicated channel strips for the DCAs, there’s really no need to add the DCAs to a custom layer. But when the console doesn’t have dedicated DCA channel strips, DCAs would definitely be part of my custom fader bank.

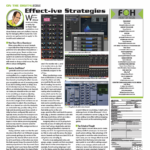
A few nights ago, I mixed a show on a Yamaha QL5, which has 32 channel strips plus stereo and mono masters, but no dedicated channel strips for DCAs. I had 47 channels from the stage plus eight DCAs that I needed under my fingers at all times, so the challenge was figuring out how to fit everything I needed most of the time on a single fader bank. There were 12 channels of drums, so they were assigned to a single DCA, which was added to the custom fader bank. This collapsed my fader requirement by 11 right off the bat. Three bass channels were assigned to another DCA (“Bass”), as were four electric guitar channels (two stereo pairs, “El Gtrs”). These DCAs were also programmed into the custom bank and — because the bassist and guitar player swapped instruments on one song but never played the same instrument at the same time — I didn’t need the input channels for electric guitar and bass in the custom bank (see Fig. 1, above).
In contrast, I had a DCA for keys, but — as there were two different keyboard players — I still wanted the input channels on the custom bank, so I could raise or lower them depending upon which keyboard player was soloing. Input channels for the backing vocals were also a necessity in the custom bank, as was a DCA, “Bk Vox” (see Fig. 2, below). Ultimately, I was able to create a custom fader bank that gave me faders for the eight DCAs plus all of the required input channels.

Other than eyeballing input levels at the show start and accessing the drum gates for one or two songs, I was able to live on the custom fader bank for the entire show without sacrificing any degree of control.
More Fader Bank Tricks
Another advantage of creating custom fader banks is that most consoles permit you to assign a channel to multiple banks, ensuring that your “star” (money) channel appears on the surface in every bank. You can also program the custom layer, so that the effects for the lead vocal sit right next to the lead vocal input channel, or place the output fader for the singer’s monitor mix in close proximity to their input channel.
Other uses for custom fader banks include changing the order of the input channels after the stage has been patched, or situations where the monitor engineer and FOH engineer have different preferences for the sequence of channels. A custom bank can also be used to simplify the number of channels presented to a novice or volunteer console operator, or to prevent them from accessing certain channels.
Steve “Woody” La Cerra is tour manager and FOH engineer for Yes Epics & Classics featuring Jon Anderson and The Band Geeks.


