Most of us are familiar with using noise gates on drum mics as a means to reduce bleed or leakage of unwanted sounds. In an ideal world, for example, the snare drum mic would capture only the snare and nothing else, but this is a fantasy due to variations in mic pickup patterns, proximity of cymbals and toms to the snare drum mic(s), and how hard the player is hitting. It’s worth remembering that a gate does not actually eliminate leakage but merely hides leakage while the gate is closed — so you still need to pay attention to pickup patterns and mic placement to reject unwanted sound.
Two gate features that are eminently useful but often overlooked or misunderstood are the filters and key inputs. Let’s take a look.
Whether hardware- or software-based, all gates incorporate a gain control device and a detector. The gain control device varies the gain of the audio signal, while the detector is sort of a remote-control signal that opens and closes the gate by telling the gain control device what to do; the detector signal could be the same sound as the one you’re trying to gate, or a completely different signal.

Take, for example, a gate on a snare drum mic. Every time the snare is hit, two things happen: (1) the snare signal is routed to the detector path, telling the gate when to open and close, and (2), the snare signal passes through the gate’s audio path. Easy, peasy — see Fig. 1.
Unfortunately, kick drum, toms and cymbals physically close to the snare mic can inadvertently open the gate when the snare’s not being hit. Known as mis-triggering, this might not be a disaster, but it prevents the kit from sounding tight while also allowing those instruments to leak into any sends intended for the snare mic — reverb for example.
The Filter
Note that the filter on the gate is not in the audio path. It’s in the detector path, so rest assured that regardless of what you do to the filter, it will not affect the timbre of the audio signal.

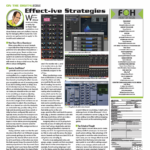
Most manufacturers provide one filter for the gate, with the ability to choose from high-pass (HPF), low-pass (LPF) or bandpass (BPF) filter types. Fig. 2 shows the Dynamics 1 (gate) section for an input channel on the Yamaha CL5. The drop-down menu for the filter offers three options: HPF, LPF and BPF. Choosing HPF or LPF gives you a simple frequency control; choosing BPF allows you to choose the center frequency and the bandwidth (“Q”) of the filter.
As a refresher, a bandpass filter is a combination of a HPF and a LPF; bandwidth determines how wide or narrow a band of audio is allowed to pass through to the detector. If you set the frequency of the filter somewhere close to the fundamental note of the snare drum (around 200 Hz) and then tighten the bandwidth to reject frequencies outside that band, the gate will open and close more reliably on snare hits because it’s ignoring much of the “noise” from the kick and hi-hat cymbals. Try it sometime, it really works!

Key or “Trigger” Inputs
Most expander/gates also provide a “key” or “trigger” input that lets you use a secondary signal to open and close the gate. An old studio trick for tightening up the bottom-end on a dance track is gating a synth bass and using the kick track to trigger that gate, creating a really tight bottom-end slam — see Fig. 3. The synth is heard only when the kick opens the gate, making it sound like the kick and synth are playing together perfectly in time.

In a live application, the key input of a gate is often used to receive the signal from a contact pickup or drum trigger (Fig. 4), both of which sense vibration (not sound waves) and produce an extremely reliable signal for opening a gate with no worry of leakage. Drum triggers can be mounted on the drum shell or on a head and generate a voltage when they sense vibration. Send this voltage to the key input of the gate, and the gate will open only when the drum is hit — see Fig. 5.

Trigger pickups are particularly useful on large drum kits with lots of toms. More than likely, each tom has its own mic, and leaving those mics open all night is an invitation for feedback — not to mention the fact that all of that rumble from the toms makes the kit sound sloppy. Placing a trigger on each tom and using it to key the gate for its respective tom gives you a reliable signal for opening and closing the gate. Plus, triggers will open a gate even when the drummer is playing softly.

You’ll probably need to patch the trigger output to a DI, then into a secondary input channel that will be used to key the gate on the audio channel. Fig. 6 shows the gate for a kick drum channel on a Yamaha Rivage PM10, where the key input for the gate is set to “Other Pre EQ” — meaning that the key will take its signal from another channel, pre-EQ). Every time the kick is hit, the trigger sends a voltage spike to the key input, opening the gate on channel 1. As triggers don’t hear sound as much as they feel vibration, mis-triggers are kept to a minimum. Slick. The downside is you’ll need more wiring, DIs and input channels — but the benefits are undeniable.
Next month, we’ll take a look at using filters and sidechain inputs to fine-tune compressors.
Steve “Woody” La Cerra is the tour manager and FOH engineer for Blue Öyster Cult. He can be reached via email at woody@fohonline.com.


