A question that seems to come up fairly often is: When should I use a bus as opposed to using an aux send? Both have their purposes, so let’s figure out how to use them effectively.
Where Does This Bus Go?

A bus is any circuit that takes a signal from point A to point B. The simplest stereo mixing console has two buses: left and right, which bring signals from the channels to the L/R output. Advanced mixing consoles can have as many as 512 buses. These buses can have different names such as aux send, group, subgroup, L/R mix, mix, stereo master, etc. The L/R mix bus is fairly easy to understand since there’s usually only one on a mixing console. If you want to hear a channel in the P.A., you must assign it to the L/R bus or it ain’t gonna get there. (There are exceptions… more on that in a minute). Analog and digital consoles typically provide an assignment button that routes a channel to the L/R mix. It’s fairly simple, as shown in Fig. 1 and Fig. 2.

When to Use a Group Bus
Group buses (sometimes called “groups,” “subgroups” or “submixes”) have somewhat limited applications. On analog consoles, subgroups are useful when you want to manage a lot of channels using one or two faders. You could, for example, assign ten or twelve drum channels to a subgroup (or two subgroups if you want the drums in stereo), and then control the level of all of those channels using one or two faders — which is also great if you’ve already balanced those channels but want to adjust the overall volume of the instrument in the mix, as in Fig. 3.

When creating a submix, you usually un-assign the member channels to the L/R mix; instead audio from those channels is routed through the subgroup fader, and the subgroup is assigned to the L/R mix bus. It’s important to remember that a subgroup is an audio path (not a control path), so you must assign the group to the L/R mix in order to hear channels that are assigned to the group. Most consoles provide rear-panel audio outputs for each subgroup, which facilitates simple multitrack recording (e.g., instruments on groups 1 and 2, vocals on groups 3 and 4).
In this case, the balance between the channels in the subgroup is exactly the same as it is in the L/R mix bus. The only variable is that you can choose to omit a channel from the group by not assigning it. Using a subgroup creates an additional output bus, but a subgroup doesn’t really allow you to create a unique mix.
Some digital consoles offer subgroups, but since digital desks almost always provide DCA (Digitally Controlled Amplifier) groups and channel linking, there’s really no need to use a subgroup as a means of fader management on a digital desk.
Parallel Processing
There may be times when you might want to assign an instrument to a subgroup and to the L/R mix bus to create parallel processing. A classic example is assigning drum channels to a subgroup and compressing the daylights out of the group, but also assigning the channels directly to the L/R mix bus. This allows you to add the compressed drums into the mix underneath the “normal” uncompressed drums, increasing presence and consistency without sucking the life out of the drums.
When to Use an Aux
Analog and digital consoles provide aux sends which, as the name implies, can be sent anyplace you want. The two most popular destinations are monitors (wedge or IEM) and effects. Here’s where we have a distinct division between the analog and digital worlds. Many analog consoles don’t let you assign an aux send to the L/R mix bus, whereas most digital desks do. And, aux sends are almost always routed to dedicated output jacks on the rear panel of an analog console, whereas digital desks usually require you to “patch” an aux to a physical output.
Unlike on/off assign buttons, aux send controls are rotary knobs (you knew that). Manufacturers could easily use faders for the aux sends, but that would make the console extraordinarily large, heavy, and expensive. Analog and digital desks always have aux masters to control the overall level for an aux.

Use an aux send when you want channels to go somewhere, but you want the mix going somewhere that’s different from the L/R mix. If, for example you want reverb on the snare and you also want reverb on the lead vocal, connect the aux send to the input of a processor (whether it be physically or digitally) and use the aux send knobs on the channels to determine the amount of reverb for each sound. Crank the aux send on the lead vocal channel to get a lot of reverb on the vox, and crack open the aux send on the snare channel to get a little bit of ‘verb on the snare, as in Fig. 4. Please don’t forget to park the aux send master at “unity” (0) and return the effects to the L/R mix, or you won’t hear them.
Aux sends are really the only option for monitor mixes because you can dial up the aux send on each channel independently of the channel fader and create a monitor mix that is completely different from the L/R mix. Different aux sends can be used to create monitor mixes customized for each musician; these mixes should never be assigned to the L/R mix bus.
Aux sends are also useful to create front-fill in venues where you’re worried about losing the vocals in the front rows. Dial up the vocal channels in an aux and send it to a couple of low-profile fill speakers to make sure that the folks in the expensive seats are hearing them.

Don’t Call Me Names
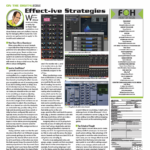
Most digital consoles simply provide a bunch of “mix buses” or “mixes” that function more like aux sends than subgroups, and it’s up to you how to use them. Let’s assume for the moment that you are mixing monitors from the front-of-house console. Keep it simple and use mix bus 1 for monitor mix 1. Build your front-of-house mix by raising the channel faders until you hear what you want in the P.A. system. Then build the monitor mix by raising the mix 1 knob on each channel until the musician hears what they want in their monitor. Three things need attention on the page for the aux send master: (1) the fader needs to be on and raised up or no audio will go to the monitor, (2) the ST assign should NOT be pressed, otherwise the monitor mix will also feed the L/R mix, and (3) the aux needs to be assigned to a physical output that’s connected to the wedge or IEM system, as shown in Fig. 5.

If you are using the mixes in a digital desk to send to an internal “virtual” effects rack, confirm that the mix is feeding the effects processor and that the output of the effects are connected to stereo channels (see Fig. 6).
Also, be sure that the stereo effects channels are assigned to the L/R mix bus. If you’re running a lot of effects, you can create a mute or DCA group to manage them more easily.
Steve “Woody” La Cerra is the tour manager and Front of House engineer for Blue Öyster Cult.


