Taking Digital Patching Beyond Just Routing
Walk into any pro studio or large live sound install, and you’ll probably find a rack of analog patchbays. Their purpose is simple: to get audio wherever you want it, whenever you need it, without tracing cables under consoles, through floorboards, and up into the back of audio racks.
With the release of firmware v1.7, StudioLive Series III mixers incorporate the concept of an analog patch bay in digital form. This lets users patch any analog input or digital return (AVB, USB, or SD) to any channel and customize their mix configuration.
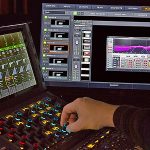
Digital patching is built into the 7-inch touch screen and UC Surface for both StudioLive Series III console and rackmount mixers, and provide a detailed overview of what sources feed each channel. This feature also allows you to freely route audio to your AVB network and record anything you’d like via USB, so you’re no longer limited to recording just the 32 input channels and the main mix.
Mixing in Parallel
“Mult” splits in an analog patchbay allow patching a single audio source to multiple destinations simultaneously for parallel processing for tweaking the same source two different ways and then blending them into a new sound.

A common parallel processing application is kick drum. To begin, patch your kick drum to two channels. For our example, we’ll patch the kick drum mic connected to Analog Input 1 on a StudioLive 32 touch screen to Channels 1 and 2, as shown in Fig. 1. As Analog Input 1 is already patched to Channel 1, simply patch it to Channel 2.
A popular parallel technique is processing one channel for sustain and big bottom-end, and another for attack and punch. On Channel 1, dial in a slow attack on the compressor, with a fast release. This leaves the initial transient uncompressed, emphasizing the beater attack to punch through the mix. This will squash the kick’s LF resonance, leaving it thinner and weaker than one wants from a kick but we’re going to get that back in a minute. Use your noise gate and EQ to focus on the frequency range of the attack, making it as tight as possible.
On Channel 2, set a fast compressor attack and adjust the release to taste. This increases the fullness of the kick, yet softens the attack. Use EQ to enhance the low-end. Mix the two channels together to blending Channel 1’s punchy attack with the fat low-end on Channel 2, to create the optimum kick sound.
Jack of All Trades
FOH engineers often have to mix monitors and mains; it goes with the territory. Many digital mixers offer tools to put monitor mix controls in the hands of the musicians on stage but you still must get the audio to their ears. This can force you to compromise your FOH sound to contend with feedback on stage.
Let’s consider a lead vocal. At FOH, you want it compressed and sustaining to enhance the vibrato and better carry the vocal over the mix. But compression can rapidly decrease the available gain before feedback from onstage floor monitors. You could send a pre-Fat Channel vocal feed to the stage. This works, but now your vocalist must monitor their performance in all its raw glory.
Here’s where Digital Patching also comes in handy. In our example, we’ll use a StudioLive 16 — a rack-mountable console with a full 32-channel mixer under the hood. Let’s take the lead vocal connected to Analog Input 12 (and Channel 12) and route it to Channel 20, too. This allows you to create a lush vocal on Channel 12 using any of the onboard Fat Channel plug-in models or optional Fat Channel plug-in bundles. As this vocal channel is for your main mix, you can adjust it without changing the monitor mix.
On Channel 20, you can dial back the sustain and still create a polished sound for your vocalist, only optimized for maximum gain before feedback. Use this vocal channel for your monitor mixes.

Any Source, Anywhere You Need It
Besides saving you the headaches of cable traces and rig rewiring, Digital Patching also lets users route the same audio source to multiple destinations on an audio network. In this example (Fig. 2), we have a miked drum kit on stage patched to a PreSonus NSB-series network stage box. These sources must also be routed to the StudioLive 24 console at FOH, to the StudioLive 24R rack mixer at monitor position, and back to the EarMix 16M monitor mixer next to the drummer so she can control her own monitor mix.
An analog system would necessitate pricey splitter snakes. But on a PreSonus Series III AVB network, you just need a few lengths of Cat-5e or Cat-6 cable and a PreSonus SW5E AVB switch (or any supported AVB switch).
First, let’s take care of the FOH mix. In our example, we’re using the NSB 8.8 to add eight more inputs to the StudioLive 24 to create a full 32-channel mixer.
From the AVB Inputs menu on the StudioLive 24, patch the NSB 8.8’s AVB Sends 1-8 to Inputs 1-8. This will route the drums to Channels 1-8 on your StudioLive 24 mixer but you have analog inputs for those same channels you’d also like to use. No problem! Just patch Analog Inputs 1-24 to Channels 9-32 using the Digital Patching menu on your StudioLive 24.

To route your drums to your StudioLive 24R, open UC Surface (see Fig. 3). From the Stagebox Setup area in UC Surface, click on the AVB Inputs tab and route NSB 8.8: AVB Sends 1-8 (GC) to Inputs 25-32, using the dropdown menu. These are the gain-compensated streams for your NSB 8.8 and are critical when using the same source to feed multiple mixers.
When your NSB-series stage box is connected to multiple mixers, you can option to designate one mixer to control its preamps, providing control of gain staging to only one engineer. Once the preamp level is set by the master mixer, every other mixer on the network has the option of listening to the same stream or the gain-compensated stream.
Gain-compensated (GC) streams let each mixer retain independent gain control without altering the FOH mix. Onboard DSP in the NSB stage boxes adjusts the level of the GC streams relative to gain set on the master mixer.
Once Gain Compensation is engaged, the Master mixer can adjust the gain of each NSB preamp ±15 dB before the change will be heard locally on any mixer receiving the GC stream.
Options, Options
Now with audio routed to both the FOH and monitor mixers, there are several options to get it to that onstage EarMix 16M for the drummer’s headphone mix:
Option 1: Route your drum channels from either mixer’s pre-Fat Channel processing. Drummers who want full control can add EQ and limiting on each channel locally on their EarMix 16M.
Option 2: Routing post-Fat Channel processed drum channels to the EarMix 16M offers a more polished drum sound with noise gate, compression and EQ for drummers that want a studio-style mix onstage. From here, the drummer can do a little EQ tweaking as needed.
Option 3: Create a drum mix on your monitor mixer and route a polished stereo mix to your drummer’s EarMix 16M. This is a great solution for drummers who want to dial in what they want to hear of the rest of the band but just want a simple level control for themselves.
Whatever option you use, the StudioLive ecosystem’s digital patching and integrated AVB routing make the process quick and easy. Give it a try!
Wesley Elianna Smith is the documentation manager at PreSonus.


